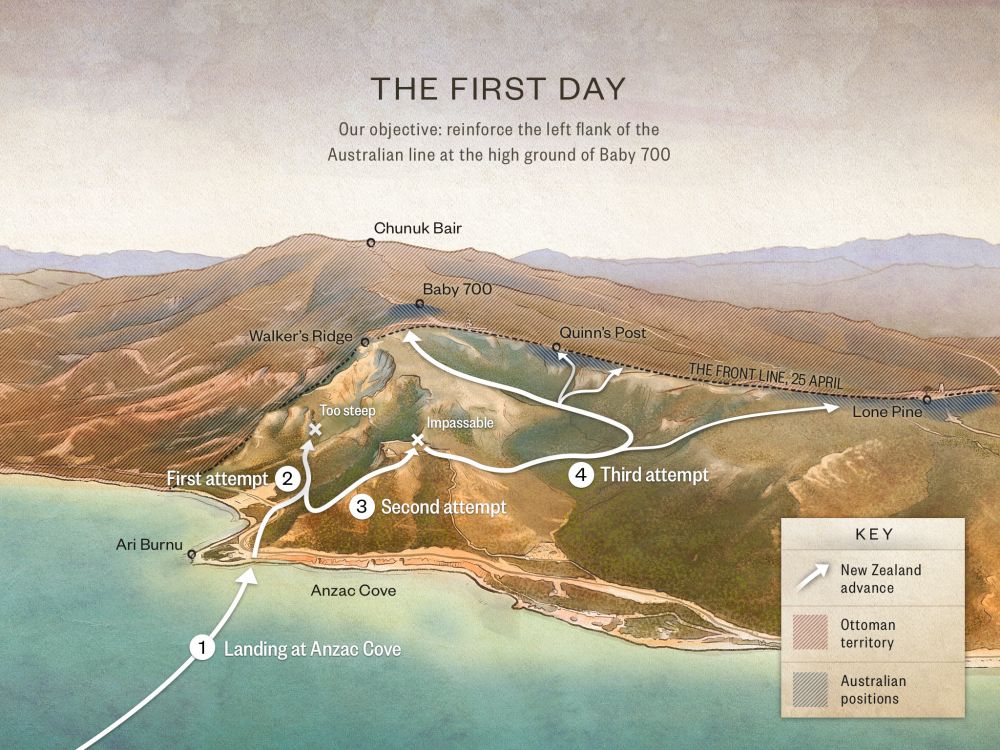
5

The Outposts

The Outposts https://ngatapuwae.govt.nz/the-outposts The men who were stationed at outposts along the beach could only move round at night. Ngā Tapuwae Trails /sites/default/files/stop/media/01%20anazc%20cove%402x.jpg

The men who were stationed at outposts along the beach could only move round at night.

GALL_Zone1_Loc_Outposts&NorthSect_48.mp3
Read this story

The Outposts

You are looking down at what is now the Anzac Day commemoration site. It’s that open patch of grassland with the plinth along the beach.

If you look at that and from there look back up to the prominent clay headland to the right – that’s the Sphinx. To the left of the Sphinx you can see a ridge with a very bushy ledge on what is otherwise a series of clay slopes. That bushy ledge spur which runs down almost to the beach – with a cemetery marker at the bottom – is Walker’s Ridge.

The high ground at the top of the ridge, which is known as Russell’s Top, is the northern end of the ground that the Anzacs gained by nightfall on the 25th of April 1915. It became the main New Zealand defensive position, because the Ottomans held everything beyond that point.

Look back down to the beach. During the Gallipoli campaign, if you walked along the beach in daylight towards the cemetery at the base of Walker’s Ridge, you would probably be shot by an enemy sniper. Most of this area was in view of Turkish snipers in the hills. But it was important to have some outposts along the beach because the Turks might attack from the north or down the valleys from the east, so a number of fortifications called outposts were established. If you look north past the base of Walker’s Ridge and beyond the cemetery there’s another spur with a very distinctive clay slope. On top of the high ground further inland from there is the site of Number 1 Outpost. The Native Contingent was based at Number 1 Outpost after it arrived on the 3rd July 1915, and the area just below it where the Māori soldiers camped was known as the ‘Maori Pah’.

Beyond Number 1 Outpost is Number 2 Outpost and then Number 3 Outpost.

There were New Zealand soldiers at all three outposts. The Big Sap, was a communication trench running from Anzac Cove out to Number 2 Outpost, Until it was dug, you couldn’t get there during the day because of Turkish snipers.

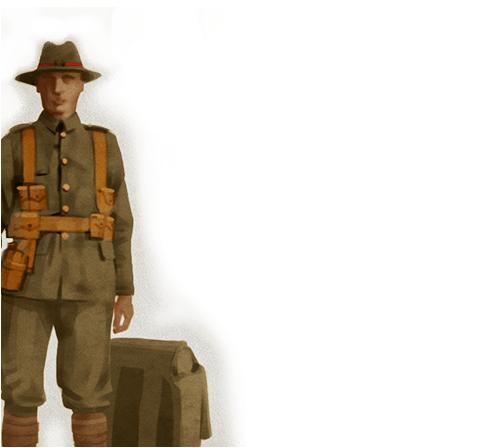
The outposts were manned first by New Zealand infantry and then by the New Zealand Mounted Rifles who arrived in May without their horses, which had been left in Egypt. A lot of these guys were graziers from the Canterbury foothills and this country looked just like home.

The Anzacs were penned into the area around Anzac Cove and could not reach the high ground along the coast to the North. The New Zealanders at the outposts sent out patrols looking for a way round to the high ground, and out of that came the scheme for the big August offensive, which involved pushing up through the coastal foothills that you can see, towards Chunuk Bair.

How to get here

Getting there

WARNING: Many locations at Gallipoli are potentially dangerous, and there are undercut cliffs and sudden drops. Go slowly and carefully - and never stand close to a cliff's edge.

From the Plugge's Plateau clearing reposition yourself along the path you came along from the Plugge's Plateau Cemetery so that you can see all the beach to the north.

Where to stand

Stand so that you are looking north along the coast towards Suvla Bay, the Sphinx will be to your right.

GPS
40°14'17"N
26°16'55"E
Decimal GPS
40.23816
26.28206
  • Scene of the Suvla and Anzac advances showing sap and outposts.
    Scene of the Suvla and Anzac advances showing sap and outposts.Credits

    Gallipoli Peninsula, during the World War 1 campaign. Read, J C :Images of the Gallipoli campaign. Ref: 1/4-058063-F. Alexander Turnbull Library, Wellington, New Zealand. http://natlib.govt.nz/records/22831847

  • Soldier makes his way down a sap from No. 3 Outpost towards Russell's Top in the distance.
    Soldier makes his way down a sap from No. 3 Outpost towards Russell's Top in the distance.Credits

    National Army Museum, NZ 1992.742 http://nam.recollect.co.nz/nodes/view/4272 

  • View of No 1 Outpost and the top of the hill beyond. The tent roofs of dugout shelters, stores, and tools can be seen in the foreground
    View of No 1 Outpost and the top of the hill beyond. The tent roofs of dugout shelters, stores, and tools can be seen in the foregroundCredits

    Read, James Cornelius, 1871-1968. No 1 Outpost, Gallipoli, Turkey. Read, J C :Images of the Gallipoli campaign. Ref: 1/4-058067-F. Alexander Turnbull Library, Wellington, New Zealand. http://natlib.govt.nz/records/23156899

  • Mules and dugouts at No. 2 Outpost.
    Mules and dugouts at No. 2 Outpost.Credits

    National Army Museum, NZ 1991.588 http://nam.recollect.co.nz/nodes/view/2819 

  • A view of North Beach from the sea.
    A view of North Beach from the sea.Credits

    Australian War Memorial P00061.004 http://www.awm.gov.au/collection/P00061.004/

Stories & Insights

Wallingford was a rarity – a man in his element wherever bloody battle raged.

The New Zealand Field Ambulance Commander worked tirelessly as the wounded and dying poured in.

A sniper team - one soldier holds a rifle and the other a periscope

The terrain was rough, and the Ottoman soldiers frighteningly close.

Otago troops marching with Union Jacks flying in the crowd

Young – and hungry for travel and adventure – they had no idea what lay ahead.

New Zealand and Australian soldiers landing at Anzac Cove on 25 April, 1915

At Gallipoli, rivalry between New Zealanders and Australians turned to respect.

Engineers pump water ashore from a water barge. Ari Burnu is visible in the background.

Try as they might, the Anzacs could never source enough water.

Within days of landing, Bayne was dead.  His diaries reveal his last tough days.

Take the next trail

The next Ngā Tapuwae trail is Holding the Line. Proceed to Lone Pine.
Link to the first stop

Decimal GPS:
64.64624688065952
-83.47657796875001
Sequence:
1
Decimal GPS:
64.18951313588443
-60.05313640625002
Sequence:
2
Decimal GPS:
62.64955646958989
-53.13280968749996
Sequence:
3
Decimal GPS:
68.41482226488074
-66.13956218750002
Sequence:
4
Decimal GPS:
68.4467764645027
-68.95206218750002
Sequence:
5

Stop Images

Sequence:
1
Decimal GPS Real Location:
40.23923
26.27684
Sequence:
2
Decimal GPS Real Location:
40.2347
26.27743
Sequence:
3
Decimal GPS Real Location:
40.23301
26.27637
Sequence:
4
Decimal GPS Real Location:
40.2379
26.282
Sequence:
5
Decimal GPS Real Location:
40.23816
26.28206