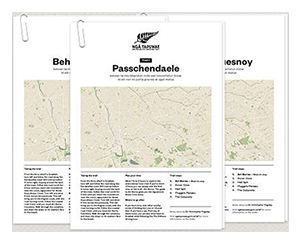
Passchendaele Start Line
If there is one battle site in Belgium that resonates with New Zealanders it is where you’re standing now. Passchendaele.
The road to your left climbs up over Bellevue Spur, which is the high ground in front of you. You can see the church spire of Passendale town on the skyline to your right. This was the New Zealand Division’s objective in the 3rd Battle of Ypres – in Field Marshal Haig’s big offensive. The aim was to break out from the Ypres Salient, and advance through this critical high ground which you can see in front of you.
On 4 October 1917, the New Zealanders, alongside Australian Divisions, of both Anzac Corps, advanced in a successful attack up to where you are now standing. Haig was eager to build on these gains and ordered further attacks. But heavy rains arrived, and Haig’s insistence on speed, meant that there was not enough time to bring up sufficient guns and ammunition. By the time British Divisions attacked on the 9th - they were held up by the German barbed wire and couldn’t gain any more ground.
However, Godley, our ambitious corps commander, was insistent that his New Zealanders and the Australians could take Passchendaele. When the New Zealanders assembled on the night of the 10th, the wounded and the dying were still lying out there from the attack on the 9th. They were freezing in the wet mud and unable to pull themselves out of the water-filled craters.
“Road terrible rough & muddy, full of shell holes all covered with slimy mud, couldn’t see holes until we walked into them. Road had been recently shelled, blocked with carts and wagons of all descriptions, dead horses and mules and men.”
Lance-Corporal McCorkindale
In front of you - is Bellevue Spur, and the road to your immediate left is the centre line of the New Zealand attack. On the left of the road is the New Zealand Rifle Brigade, and on this side is the 2nd New Zealand Brigade, spreading through and into Berlin Wood which is on your right. Beyond Berlin Wood are the Australians.
“The whole countryside looked forbidding. It was a sea of mud, caked dry only on the surface, with shattered trees marring the landscape. Beyond towards the slopes, I could see the scarred ridges of the frontline. These belonged to the Germans who had an uninterrupted view of the greater part of us. It looked exactly like what it was, a shell-torn, muddy and dreary waste. It was probably the most uninviting and unhealthy place in the world.”
Private Len Coley
Picture this whole landscape on that morning in 1917. It was a cratered wasteland full of mud, dead bodies and wounded men who had been out in the cold for 36 hours among the dead from the previous attacks. These trees and farmhouses were totally flattened - it was a lunar landscape laced with barbed wire entanglements. The cellars of these farmhouses that we see today had been converted into German strong-points, low concrete bunkers - with walls metres thick - that housed their machine gun teams.
On this misty raining morning, picture the men of the New Zealand Division in craters where we stand, mud up to their knees, soaking, they’ve been here all night. As the artillery bombardment started they were to move forward and secure Bellevue Spur so that the Australians on the right could sweep in and take the village of Passendale.
The plan was that at zero hour - the arranged time for the attack to commence - the infantry would advance behind a creeping barrage that would move forward in hundred-metre steps with the infantry moving in a series of single files through the wire, which hopefully the artillery had already cut. They’d move up the hill and of course they would be advancing as close as possible behind the rolling artillery barrage so that the German machine gunners - safe in their pillboxes - couldn’t get out in time before the New Zealand infantry were upon them. That didn’t happen here.
Getting the guns forward through the never-ending mud was dependent on that one road to our left, and only one-third of the necessary guns made it on time. To support an attack like this - each gun needed something like 300 or 400 rounds of clean ammunition, a real task in the mud and rain. Each gun also needed logs and wooden planks under their wheels to stop them sinking into the mud and from moving off target. To supply all of the ammunition and wood, and for the horses and men to drag these enormous weapons through the mud, was an incredibly difficult task.
“I know how impossible it was to move the guns in time for this second attack. Horses were useless in such mud and the guns were inched forward by manpower - out of the muddy water in one shell hole to slide into another. All that could be done in the time allowed was to set them up on the firmest ground and fire them at extreme range.”
Alfred Thomas Stratton
There weren’t nearly enough guns or ammunition, and when the artillery opened up it was weak and inaccurate. Indeed, the opening barrage landed right on the New Zealand positions killing our soldiers, knocking out the headquarters and blowing up mortar ammunition. It was a disastrous start.
Picture the infantryman - wearing everything he has because it’s very cold. He’s got 200 rounds of ammunition, his rifle, bayonet, grenades, gas mask, satchel, water bottle, rations and steel helmet. He’s rugged up in a greatcoat, with his jerkin on, and his balaclava, and if he’s lucky he’s got over-boots on, to protect his legs from the sea of mud he is attempting to walk through. His Corporal or Sergeant is leading his file and he’s trying to find a way through the landscape, carefully skirting around the edge of each crater with his rifle and bayonet at the ready, trying not to fall down into the huge water-filled holes. The initial artillery barrage moved too fast for the infantry struggling to keep up, through the mud.
The artillery fire was too weak to cut the barbed wire defences and to keep the German heads down. The Germans realised this, came out of their bunkers and began to set up their machine guns. They purposely left the road leading up Bellevue Spur clear of wire, creating a kill-zone, and as the New Zealanders advanced up it - the German gunners opened fire, and mowed them down.
“The boys were dropping on all sides; all of our officers in 10th Company were killed yet the lads never flinched… I only saw one of our Company up at the wire with me & the poor fellow got his head split open with an explosive bullet… Poor George Scott got a bullet across his face which blew out both eyes & broke his nose. I had one hit the shovel on my back & another through my gas mask bag hanging at my side.”
Private David Grant
The Germans had redeveloped their defensive strategy and now relied on a series of reinforced concrete pillboxes that were dispersed in-depth along a wide front with interlocking fields of fire. In the surrounding craters and trench systems there were machine gun nests protected by thick entanglements of barbed wire. This was an ‘elastic front’, with groups of men ready in the craters and bunkers behind waiting to counterattack.
On your left, the New Zealand Rifle Brigade fought their way forward taking the high ground which you can see on the skyline. It was a critical piece of ground, however the wire between it and Bellevue Spur had not been cut. On the road in front of you - a young second-lieutenant in the Otagos, Cockerell, edged forward through the wire and took out a bunker but he only had a handful of men with him. Each attempt to get reinforcements was thwarted - with his runners killed by German fire.
By mid-morning the New Zealand attack ground to a halt. The battalion commanders gathered at the bunkers at Waterloo Farm, which are the farm buildings on the other side of the road. They knew that this attack had failed. Only the stretcher bearers were not fired on as they dragged wounded men to the road which was the only firm ground.
It took at least six men to carry each stretcher. Thousands of infantry men were called up to join the teams of stretcher bearers, and the line of wounded ran all the way back up the road to the New Zealand Memorial. Among the wounded were many British soldiers who had been out here for three days. For each stretcher party it was an exhausting carry, and it would sometimes take a wounded soldier about 24 hours to be carried back to St Jean where there was an Advanced Dressing Station. It was only then that the ambulances took over and drove them further back for treatment.
“The Somme was pretty bad I’ll admit but this is worse. I have never seen such destruction. It is hard to imagine that four years ago, peaceful people tilled this same soil, that it was one of the most prosperous districts in Europe. Now, as I saw it today, well it’s simply an awful nightmare, a hideous reeking swamp seething with living and dead beings.”
Sergeant William Wilson
It was a failure in command, where an overly ambitious plan, backed by a poor logistic effort, took no account of dreadful weather conditions. 12 October 1917 became the darkest day in New Zealand’s history of warfare, with over 2,400 casualties in the first four hours and around 845 men dead.
, part of the Third Battle of Ypres in 1917, showing the advances on 4 and 12 October.")